
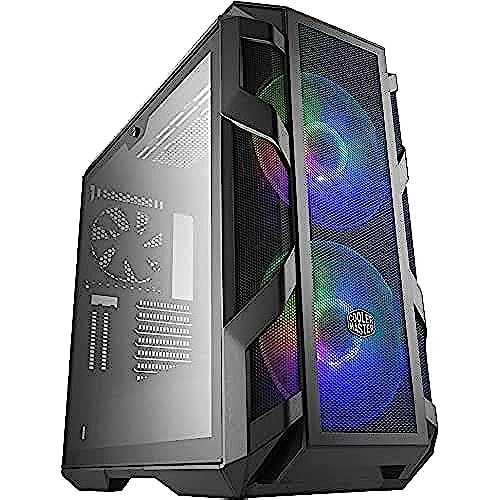
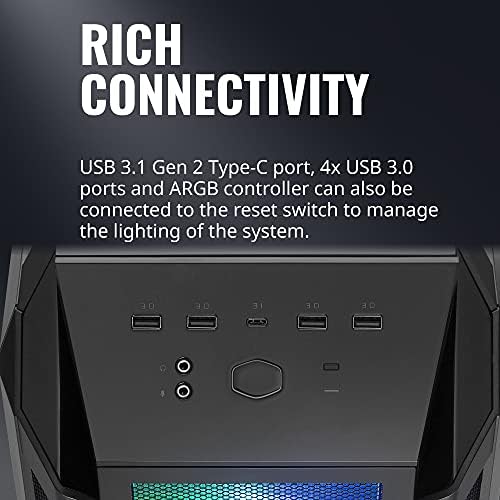


Cooler Master MasterCase H500M ARGB Airflow ATX Mid-Tower with Quad Tempered Glass Panels, Dual 200mm Customizable ARGB Lighting Fans, Type-C I/O Panel, and Vertical GPU Slots (MCM-H500M-IHNN-S00)
-

Justin M.
> 3 dayVery solid well built case. Has plenty of room for cable management and was relatively easy to build in although I would be mindful of ram clearance if you are going with a topmount rad depending on your mobo (I went with an msi x570 mpg edge gaming wifi and an msi 240mm aio and it was a little tight but fit). My only real complaint as of right now is the noise level, it isnt crazy loud but definitely noticeable compared to my last pc that was in a corsair carbide 100r. Im not really sure if this is necessarily the cases fault to be totally honest, I also think it may have to do with how I ended up wiring my fans with both of the front 200mm fans and the rear 120mm fan all coming from the same mobo header. Its not loud enough that you notice but with headphones on but if you have a quiet house you will notice it when you walk in the room. Overall I am a fan of the case, the airflow is killer and it looks good and that is more than enough to make up for it being slightly noiseier
-
go0den0w
> 3 dayWhen I purchased this case, I had never built a PC before. Id also recently ended my 5-year career as an electrician to go to law school. I needed a hobby & a way to satisfy my need to build stuff. Well, I have gone to town on this case and loved it. Most of the black screws it came with are half silver from me taking it apart so many times. The case is big enough to be a sort of blank canvas for just about any configuration you can imagine, albeit with some limitations: I think its a bit small for a 16mm OD PETG custom loop; I wish it had been designed to support bottom intake fans; and the top clearance for a 360mm AIO/radiator is too small for a push/pull configuration. Keep in mind if you continue to read, I am running an overclocked i9-10900K & need as much cooling capability as possible (with all case parts still properly attached, of course) The stock 200mm fans look good and move a decent amount of air, but I replaced them with higher CFM (& IMO better-looking) Thermaltake Riing Trio 20s. Be mindful: the screw hole configuration for front 200mm fans is different from that for the TT 20s I put in. The stock CM 200s support two different screw layouts. Limited by the layout, I mounted the TT 20s diagonally with two screws & used double-sided adhesive foam to dampen any noise vibration might cause from the 2/4 screw mount. I havent heard noise once. There is no bottom fan support, but I was able to push some air up to the top AIO by cutting in a 2 hole on the front HDD shroud & mounting a 120mm fan over the hole. I wish I didnt get an HDD since the rack is easily removable (& moveable btw), leaving ample space for more modification--might make some bottom fan support in the future, who knows? Similarly, the case does not support mounting a radiator/AIO to the right of the motherboard, but the metal cover there is great for cable management and is also a good place to mount RGB/fan controllers &/or USB hubs out of sight. Further, a little drilling, a few washers, nuts, & 6-32s later, the metal cover is great for holding up my little Pikachu acrylic. The vertical GPU mount is great, but know that--in my case, at least--the card will end up close to the glass, which may restrict air flow to the GPU fans. I have yet to have any issues with thermals, but I am also running a 3060 there, which is limited much more by its hardware than thermals. I also added a GPU support because the GPU sagged a bit and was slightly crooked when only connected to the vertical mount. When using a top-mounted 360mm AIO/radiator equipped with standard 120x120x25mm fans, the fit is tight. The back fan pushes harder against the 4+4 CPU power connections on my Aorus Z590 Ultra motherboard than I would prefer, but I have yet to experience any problems. If pushing against the cables worries you, be sure to check the dimensions on your AIO before purchasing or opt for a smaller AIO/radiator. I had this issue with both the CM ML360 & Arctic Liquid Freezer II. Furthermore, if you plan to top-mount an AIO/radiator, you cannot fit a push/pull configuration because of clearance issues with the CPU 4+4 connections. I tried mounting pull fans on top of the bracket to remedy this but even using 120x120x15mm slim fans, I could not close the top cover. Obviously, the front is mesh, but the top is acrylic with no mesh option available. Skeptical, I removed the top cover and averaged 5.5 degrees lower in stress tests. I assume this is because my AIO was able to expel exhaust heat much better. I dont recommend you do this, but I ended up taking a Sawzall to the top & removing most of the acrylic so I could fit some aRGB pull fans on top of the AIO. 120x120x15mm fans fit nearly flush with the top cover once the acrylic is out of the way. It snaps out if you do not want to cut it, but that leaves large holes where dust, etc. can get in & takes away from the look. If you go this route (for real, dont do it), you may want to buy grille guards since the fans will be much more exposed. You can front mount an AIO/radiator. I tried it. The hoses probably will not be long enough to reach the CPU if you mount it connections down, and the HDD shroud will further complicate this. Hoses up will reach, but then youre left with the decision of whether to pick from either of two undesirable options. You can (a) flip your 200mms over to the ugly side & use the 200s as pull fans for exhaust and whatever fans the AIO/rad comes with as push fans. In this case, youll be pulling hot air from inside the case to cool the liquid in the rad/AIO and taking away from the good looks of the case. Alternatively, you can (b) not flip the 200s & use them as push fans and use the AIO fans as pull fans. This blows hot exhaust air into the case. With no bottom fans, youre left with trying to use the top (restricted by acrylic plus hot air rises) or back (supports 1 140mm fan) as intake. I tried (b). I even mounted a 92mm fan on the PCI expansion area to try to push more air into the case. Thermals were bad. Mount your AIO/rad on top & save yourself the hassle. Regarding aRGB, the case comes with this little joke of a controller you can install to convert the computer reset switch to RGB control. I never even took it out of the plastic. Buy an aRGB controller unless you plan to connect the included 200mm fans directly to the aRGB header(s) on the motherboard. Some general advice (since no one asked): try to find a brand you like for aRGB & stick to it. At one point I had four different RGB apps and its annoying.
-
Daniel F.
> 3 dayCooler Master took everything wrong or low grade about the H500P to heart and fixed it with H500M. The front and top panels which practically fell off the H500P are screwed in now and the seams align better. This has a GPU support bracket which I was using (now using the Cooler Master vertical GPU bracket) It has ARGB fans which I obviously love. PSU shroud is a huge improvement over the H500P Cable Management is alright, not spectacular but not bad. I have seen better and much worse. Overall quite good. Built super well, great quality, premium case Honestly I could go on and on but everything about this case is amazing except for two things. TWO CRITICISMS : The front 200mm fans are not PWM and I believe they should be, I would also like 1500rpm, hence the PWM. I get it would be loud but I want the option regardless. Personal preference but for the price of this case....I dont think it is a big ask. The next is one I have for EVERY Cooler Master ARGB fan, they simply do not put enough LEDS in the fans and I also wish they would use brighter LEDS. For a 200mm fan they should have put LEDS on the outside edge like the Corsair QL Icue fans I have or at a bare minimum used LEDS which are twice as bright.
-
Jacob Solo
Greater than one weekUSB Ports were good the first year and a half, ever since then I’ve been dealing with on and off ports that would heat up for some random reason and then on top of that would cause the PC to freeze for a second everytime I had my controller plugged in and was playing a fast paced game. It wouldn’t really happen playing casual games or casually playing. I play Bluetooth now, but even then, the Bluetooth devices are faulty now too, and I feel like it’s also due to the ports maybe causing the Bluetooth drives to overheat and probably malfunction. Now my controller won’t stay connected to the computer even if it’s fully charged. It will connect for a few seconds and then disconnect immediately.
-
KevinM
> 3 dayI am extremely happy with this case. There is a video around somewhere on YouTube where they did review on cooling with this and like 20 other cases. Not only did it come out near the top but it was also one of the cheaper ones. It definatley lives up to that. The cooling is great. I only added one extra 140mm fan at the top vent and set it as an extra exhaust fan. I have a 2080 nvidia and an i7-9700k processor with a cpu cooler that is probably not good enough for that CPU. I run a temperature tracking program and my cpu and gpu dont get hotter then about 62c during heavy gaming at max settings. Its all very quiet too. My old gaming laptop seems like a loud boiling jet engine now. For my first pc build i found the directions were easy to understand. The important screw holes and cords in the case are also labeled so its easier to know what to do when putting it together. The carrying handle feels sturdy so far, i transport the desktop around to friends houses to play vr games. Overall highly satisfied.
-
Eclectic Science Guy
> 3 dayI purchased this almost 2 years ago and would still give a 5* rating. Good - Assembly went well and was relatively easy. Cable management was also easy - Cooling is great through the mesh covers - Its relatively easy to clean the dust out of said mesh covers. Remember the one under the power supply too - No malfunctions in the fans, LED lights, or with the front USB panels. Neutral - I filled all the drive bays and wanted to add another 2.5 SSD. It was easy enough to use Velcro strips to securely hide it behind the bracket that runs down the case, next to the motherboard. Only do this for SSD drives, not standard spinning hard drives. Bad - One of the screws for the tempered glass side panel wont screw in all the way. Its been an while, so I forget if it was the screw or the threading on the hole for it, and it holds well enough, its just not pretty. - This one isnt CoolerMasters fault, but the RGB standard they use is different from the one my Asus motherboard uses. The included controller works fine - with some cable management work, I got mine to sit mostly hidden beside the motherboard, where I can slide the top magnetic filter mesh aside and poke the controllers button from above.
-
Micheal
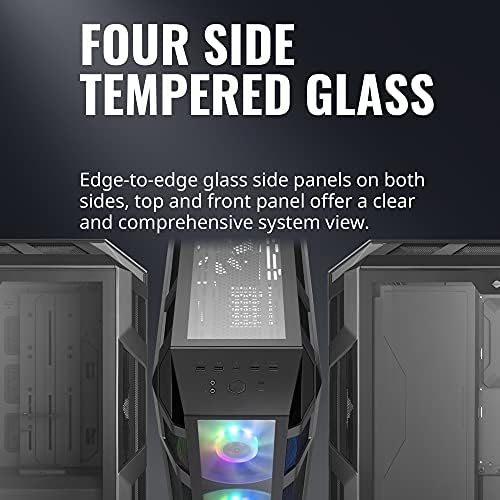
> 3 dayFirst off, the case looks great. However, I am not a fan of the current trend of tempered glass computer cases. This one has four sides with glass on it (counting the optional front piece). And as the title says, the front piece arrived shattered in a thousand pieces because it is packaged on top of the case covered by a 1/4 piece of foam. Obviously something hit the top of the box during shipment which cause it to break, but still a disappointment none the less to pay over $200 for a case only to have it arrive with a broken piece. So I am just using it with the mesh front. As far as the performance, I thought this would provide great airflow to keep my AMD 3950X CPU cool. And it is good. According to Ryzen Master, the idle temperature is around 35 degrees Celsius, which is about 3 degrees higher than my previous case (AZZA XT1). The AZZA had two 140mm intake fans, one 120 mm and one 230mm exhaust fans. At idle, my computer was running around 31 degrees. Under load 50% load, it would hit about 63 degrees while rendering 4K video. When rendering a video in the H500M, the temperature fluctuated between 61 and 63 degrees, thus cooler or at the same temperature of the AZZA case. In my very unscientific test, idle temperatures are higher that I expected in the H500M, most likely due to the tempered glass sides. However, when the CPU is working, it is just as good or better than my previous case. I would recommend this case, but hopefully Cooler Master packages the extra glass piece better in the future.
-
Kevin Wolf
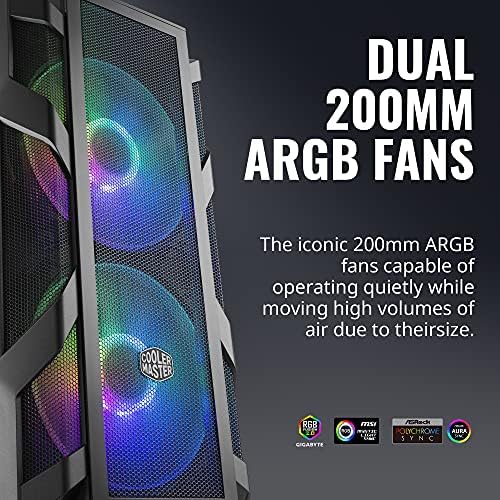
> 3 dayAll in all the case is pretty solid. Offers a nice amount of cable management space, the two big 200mm fans are quiet and move a lot of air (although Im replacing them with 3x120mm fans). A 360mm liquid cpu cooler radiator will fit in the front of the case; however, the tubes are supposed to be on the bottom when you front mount, and the HDD Bay blocks where the tubes should go, so you have to remove the HDD bay (indefinitely) to properly install a 360mm radiator. Even if you dont need the HDD Bay, ensure that the tubes on your cooler are at **LEAST** 16 inches. The 360mm cooler master radiator has ~12in tubes and it wouldnt reach the cpu when routed around the GPU and beneath the RAM. I returned my 360mm and opted for a 240mm, awaiting that item(Dec 20th) and will update the review if necessary. You could also squeeze a 360mm radiator at the top of the case, but half of the third fan will be blocked. This isnt advisable, and CM website states the top only supports up to 240/280mm, with predrilled holes for the screws to secure the radiator to the top of the case. If you do want to put a 360 at the top, youll want some thin black washers, since the predrilled holes are for 240/280, the holes wont line up for a 360mm. The vent holes at the top of the case are just a hair too big, and allow screws to freely move through them, slapping a small black washer between the top of the case and the screw will allow you to use any vent hole as a screw hole, and the magnetic dust cover will hide it all without a problem at all. The front mesh panel is a little bit thin, but thats not uncommon. Just be careful when moving the pc around, pulling it out of the box, etc, to not press too hard on the front mesh panel, as the mesh could bend and become unsightly. It is nice that they also include the clear front panel as well, although that would hugely reduce the airflow and I wouldnt reccomend it in a mid-high end gaming pc. The quality of material in the rest of the case is pretty superb. Thick metal, nice cable grommets, full array of mobo standoffs presinstalled. The PSU cover/shroud is a tiny bit flimsy, but thats no big deal since its held in by a screw and rarely ever gets touched after the first installation. The HDD bay is a neat design, with little doors that you open and can pull the HDD tray straight out, install the HDD on the tray, slide the tray back in and close the door. The whole case is modular, and you can remove any panel that you dont like inside the PC, including the HDD bays, the power cable cover, the psu shroud, etc.
-
AuroraFalchion
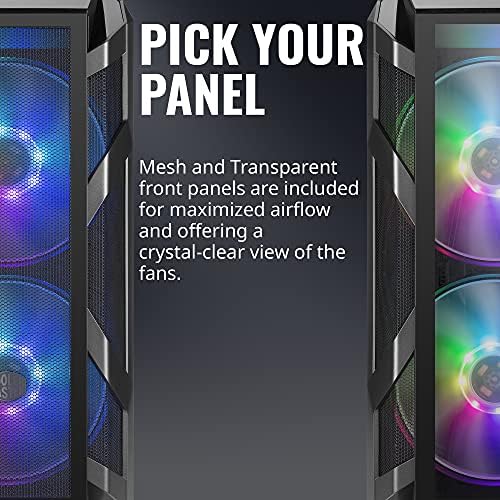
> 3 dayPros: -Good quality for the price -Mesh/Acrylic front for preference options -back and front fans run decently quiet, I was very impressed -RGB controller and fan splitters included allow expansion for more fans, some cases dont have this by default -Side mount GPU slot if needed -Magnetic mesh mat on top Cons: -No tooless design to remove the glass side, this is kind of a petty point, but just noting it -Lack of support for 200mm fans outside of Cooler Master Propriety fans - granted there is not a 200mm standard, but this cases large selling point is the 200mm fan option so the fact that Noctuas 200mm fan thickness wasnt considered during construction is a let down for customers, more details on this below to make it fit in the top Overall the case is quite good with sturdy construction and 200mm fan options allow excellent airflow even at low RPMs for quiet operation. RGB works with the included controller. It didnt work straight forward with mystic light, but Ill figure that out later. Didnt buy it for the RGB so no proper review for that part, but the included RGB fans look quite good if you were going to go for that aspect. The switch controller works, and has a third connector for daisy chaining more rgb fans together. The same goes for the power connector so everything can be in sync. The side panel, PSU shroud, drive bay in the bottom, and cable management bar(? thats what Im calling it) are all easily removable as needed. I had no reason to remove the front panel, so no feedback on that. Im using the Rosewill 1600 watt Hercules PSU which is quite large, but the shroud covers the exact length of the PSU casing. So there is plenty of room between the PSU and the front of the case. You will still need to unmount the drive bay for a PSU of this size since itll be in the way of the cables. A normal size PSU would not have this issue obviously. My mobo supports multiple m.2 for boot and storage so no issues on my end. The drive bay still fits between PSU and case front even with this PSU. Its just that it cant mount securely where it normally would. So if you absolutely need the storage, the drive bay will indeed still fit there as needed in worst case scenario. The case itself is very nice to build in. I love the space. There are plenty of slots around the motherboard section that allow for slipping cables through from the back at the top and bottom to make for neater cabling in hard to reach places. I normally dont care about it too much, but it really was pretty easy to cable manage without much effort. The plastic handle space on the top is for moving an empty case, but for a fully loaded case its not practical. Unless you want to have your wrist twisted backward while trying to carry this two handed, then the handle section on top has no purpose other than to house the front USBs and power switches. They likely did this to make sure no inside space was taken up by USB/Switches portions, and they just dual purposed the external housing with a handle on the backside. This is why I dont consider this a con. Im just noting that this handle isnt practical for assisting with moving a loaded computer since its too awkward for lifting two handed, and its not metal making one handed carrying a little risky in case the plastic fractures or breaks. Last point is concerning Noctuas 200mm fans. I got one in the top, but didnt try the front. Ive heard they dont fit without modding the front a little though. For the top portion, remove the rubber corners to prevent them from getting damaged during the next part. Then, before forcing it into the 200mm slot, ensure that you have the fan lined up with the holes on top where youll screw it in, then push it in until stuck then give it a good shove. If need be, you can push on the top metal mesh a bit to give it more wiggle room until its forced in. Once its in, with some careful force you can line it up to the holes. You wont break the fan nor the case, both are very sturdy. No this didnt deform the top metal mesh portion of the case. To save yourself some hassle, just use the included screws instead of the silicon options. Since the top section has a magnetic mesh mat as well that goes on top, you wont notice the screws even when glancing over it.
-
Roman
> 3 dayFor 100 dollars, this case really is one of the best out there. You get a full fan layout (2 front fans, 1 rear fan). It comes with a PSU shroud as well. The tempered glass is very high quality. There is plenty of room in the back for cable management, and the back panel has a great mounting mechanism with two thumbscrews. This case also comes with some accessories like an RGB controller and zip-ties for cable managing. When it comes to airflow this case might be the best performing. The two massive 200mm fans on the front pull a tremendous amount of air through the case, while still being quiet. The design is quite nice as well, with a handle for moving it around. There are two dust filters, one for the PSU and one for any top mounted rads/fans. Overall very, very nice and worth every penny. The only con I can think of is how the tempered glass panel is held on by slotted screws instead of philips. Still pretty easy to tighten though, can be done by hand. But I think the fact that the panel has a resting ledge so it does not fall off when you unscrew it makes up for the odd screw type. 10/10 would buy again, and probably will for future builds.
