
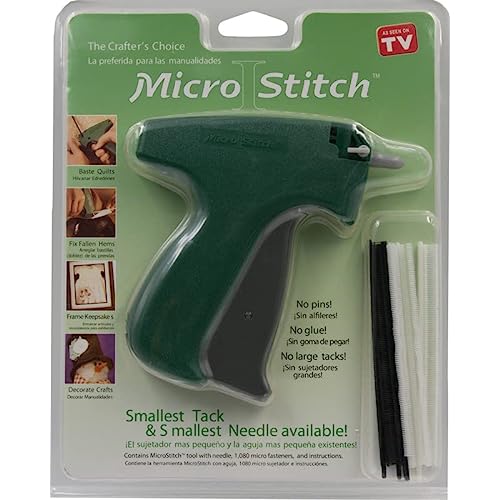
MicroStitch Tagging Gun Kit – Includes 1 Needle, 540 Black Fasteners & 540 White Fasteners (Starter Kit)
-

Leticia Godinez
> 3 dayHighly recommend If you a busty woman who doesn’t like a lot of cleavage showing this really helped
-
Crafter1955
> 3 dayLove this for a number of uses.
-
Cellochick
> 3 dayI gently used this for two months- and I really do mean gently used. I was so sad when out of the blue the entire tip of the gun broke off today. It’s now useless. Up until today, I would absolutely find an occasional but necessary garment for it to tailor. My chest is a larger size than my waist and hips; I loved how useful it was to secure and quickly tailor my tops using this stitching gun. I reached out to their customer service today and will update my review if they send a replacement. Hopefully they reply and send a replacement. Maybe I just got a lemon? In the meantime, I can’t say it’s worth shelling out this money having broken so quickly and with no customer service guarantee.
-
Just Nina
> 3 dayWill never take the place of a proper tailor but will help you with a quick fix. Needle is thin so it really doesnt damage fabric but of course if you suspect fabric is delicate then do not use. So far loving it!!! Highly recommend.
-
Kathleen M. Rotondo
> 3 dayDid not come in original packaging. Did not come with any instructions.
-
JO
> 3 dayThrow in the dance bag or your little performers emergency kit because this is a life saver. Easy and quick repairs to costumes and headpieces.
-
Franz Hermann
> 3 dayLove this ! I just hate when it jams because it will . But absolutely love this
-
Athena
Greater than one weekI havent sewn much since I purchased this item and until I thought of a new use it had been more of an out-of-sight-out-of-mind victim than a useful tool. I find walking around the bed, up one side and down the other, over and over until the bed is finally made very tiring and often wished for an easy way to keep the various layers together. I thought the blanket pins purchased here were the answer but theyre difficult to get through layers, even with some sharpening, and they do poke holes in the sheets, so their use is limited to certain spots. I thought Micro Stitch might be the answer but the tacks arent long enough to fasten several layers. Where Micro Stitch has excelled is on the bottom-most layers. I was able to tack the fitted sheet to the mattress pad all the way around and the top sheet to the bottom sheet all the way across the bottom and partially up both sides. There is some straightening that has to be done in the morning but its far less now, and I find the tacks are easy enough to remove although there is a dedicated tool for the purpose if you dont mind paying the difference to purchase it from a source in Great Britain.
-
Janie
> 3 dayIts ok in a pinch
-
Rebecca Patton
> 3 dayLove the idea of this product. I use this to pull the gap together on shirts that are a little more revealing than I would like or the fabric pops up and gives a glimpse to what’s underneath lol. Saved me a few times already from showin the girls in the office with my button down shirt!


Microstitch User Instructions
|
|
|
|
|
|---|---|---|---|
Removing the needle guard
|
Loading micro fasteners
|
How to remove a partially used clip
*Always discard clips that have micro fasteners that are out of place, distorted or damaged. A damaged clip can cause feeding or jamming problems. |
Inserting micro fastenersPush the needle of the tool through the items to be attached. Hold the material firmly against the front of the tool and squeeze the trigger completely. Release the trigger. Withdraw the needle and tool from the material. Material is now securely attached. |


|
|
|
|
|
|---|---|---|---|
Installing needles
|
Removing Needles
|
Helpful tips
|
|

