
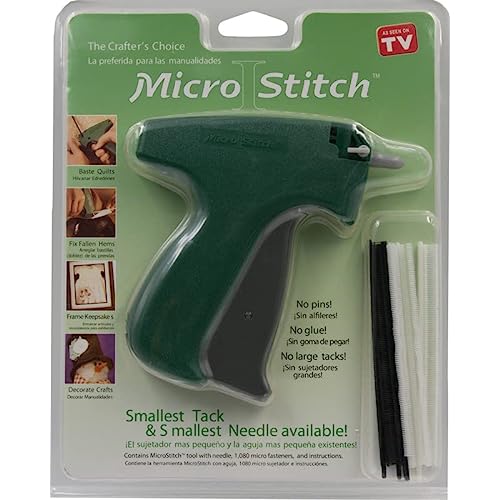
MicroStitch Tagging Gun Kit – Includes 1 Needle, 540 Black Fasteners & 540 White Fasteners (Starter Kit)
-

Piraha Mura
> 3 dayIts not a nail gun, not a stapler gun, not even a tag gun. Its a rather delicate thing so if you use it as a gun it will not last long. Its decently manufactured so if you treat it gently like sewing machines it will be fine. The tags are exactly like those used in attaching labels to clothes nowadays. But this is a short proper letter I shaped plastic tag, with the top bar and bottom bar. The height of the character is 4mm as specified. The stitch is basically a hollow needle that go through the fabric. The top of the I is bent in the same direction of the I body so both of them slide through the hollow needle into the other the side of the fabric. When the trigger is released, the top of the T reverts to its natural orientation. So the layers of fabric is sandwiched between the top and bottom of the I tag. Being hollow, sharp and thin, the needle is rather delicate. Indeed I bent the tip a bit when I tried to stitch into my leather crouch with something harder inside. But it still works. Its not a power tool. You have to push the needle through and through into the fabric yourself. Theres no point to shoot the tag through. You can actually squeeze the trigger slowly and gently, and the tag will slide through. What it is good for? Ideally the total thickness of the fabric or thing to be stitched is 4mm. In this case the material have to be able to compress a little to let the top of I to return to its orientation. (You dont need to aware of how the stitcher does this.) If you stitch thin materials, a reviewer said that you have the option of pushing the needle through the fabric and then back up, like using a sewing needle. This single stitch can be about 4mm long. The tag isnt stronger than sewing. Its different. For sewing the force is distributed along the stitches. A single tag alone doesnt survive tearing apart the fabric by hand. The strength depends on how many tags you apply and the strength and density of the fabric itself. If you are stitching thick materials, they cannot be too dense. The needle have to be able to go through it. The needle is a bit thick compared to simple sewing needles, so it is harder to go through thick materials. The cushion cover and armrest of my leather crouch have long degenerated. Otherwise its a perfect piece to sit on, and now becoming an semi-antique due to old age. The cushion is square and over 8 deep. By square I mean every face is rectangular. The problem is that it does not have 6 faces, but more like half of a T viewed from the top. The leather is hard to match, real or fake. Even if matching is not required (by wife), I dont see how I can find a custom made cushion cover or the whole cushion. I have been considering the options over the years, including buying a sewing machine and made a cover ourselves. But so many things can go wrong and it probably wont turn up nicely, at least for the 1st trials. When my wife was browsing online for crouches over $1,000, I know its time for action. First, I got the idea from the web of using a wooden board at the under side of the cushion, and use a stapler gun to mount leather onto it, with the cushion in between. Then I think this one might work by stitching leather to leather and get rid of the board. I was thinking of making a temporary cushion cover but without sewing and measuring. When this guy arrived, I went to the nearest fabric store to get myself some faux leather fabric. Its more common than you think. I went to the store where you can get milk and motor oil at the same checkout! I would have ordered from Amazon but Im not sure how the color will turn out. Matching is out of the question. So I designed a two tone leather crouch, one tone fake, and one tone real. When I got everything together, I knew what to do. I gifted wrap the cushion with the faux leather and used the micro stitch to hold it together. I discovered that a tight wrap doesnt work. That will be easier with staple gun and wood board. A loose wrap turns out nicely. Most of the cushion is a rectangular block so its easy. The stitches are mostly at the hidden areas. When its difficult to hide the stitches, I leave fold lines at the visible area and bring the stitches under the cushion. The little bit sticking out of the rectangular block is a nightmare. Otherwise I would have finished in 5 minutes. Somehow I ended up with diagonal fold lines around that little bit. It was a proof of concept model and it turned out to be working so far. It looked OK, as compared to severely weathered leather and exposed naked cushion. I applied few stitches but the whole thing survived several days of sitting on, both adults and kids. Although its loose fit with some fold lines at the side, it looked like soft leather at a few feet away. The two tone isnt too bad. But if I can find better matching, I will replace it at $7 a yard and 5 minutes of work. The problem is when you drop yourself on the cushion at some height, the cushion cover will turn into a balloon and blow air into the weakest link, or tags. So far Im sure some tags are dislodged, but I have yet to repair my creation.
-
Peg in Canada
> 3 dayGood for tacking the fabric when you roll up your jeans or trousers. I used it when I draped a sweater over my shoulders so it didn’t slip off. I think it would also serve to ‘pin’ things to take for alterations. I might order some refills of the tabs so I don’t run out.
-
vsajewel
Greater than one weekIve only had this a few days...but I love it so much I wanted to write a review. Why, you ask? Becuase they were serious about keeping that little needle covered...this is a safety warning! But then Im really a klutz too...seriously...I must mention this in other reviews! Its not really a stapler...really its it teeny tiny Product Tag Attacher Gun. You know...those plastic loops everyone uses to affix price tags? Its just a tiny version of this...which is actually really cool! Instead of a long plastic loop, theres about a 2-3 mm thin plastic strand with Ts on each end. One T goes in one the thing you want to affix and the other in the thing youre affixing it too. (But you do both at the same time with this gun.) The plastic strand in between is just short enough to not allow the 2 attached pieces to flop around...but just long enough to get them to easily attach! Its really quite brilliant! What do I use it for? Ive grown super sensitive to clothing tags...you know, the ones that use scratchy fishing line-like thread or melted edges to keep from raveling? They dont ravel...but they do scratch me ALOT and sometimes they make me itch too. They are very uncomfortable. So I cut tags out of almost everything at the neckline. But once they are cut out, how hard do you think it is to match them back up with the proper clothing item again? Youd be right if you guessed near impossible! Im tired of never knowing what brand or what size or even what the fiber content is of anything that I wear!!! So I decided Id try to reattach the cut labels somewhere they wont bug me...like the hem, or an inside (wide) seam. But I knew that real staples would certainly annoy me. Thus began my search! I actually did find a real stapler but it hasnt arrived yet and its from a tailor supply house, not from Amazon. It probably wont work for this use, but I sew a lot too. So, this little device is perfect for my needs! I sorta laughed when I read the repeated warnings about keeping the needle cover on...theres a needle lock too! Ive used these types of guns before and I thought it was definite overkill. But guess who was bleeding after attaching their very first label? That needle is amazingly sharp! Maybe thats why it works so well? Anyway, I still love it and doubt that it will be the last time any blood is shed...but its worth it just the same!
-
The OConnors
> 3 dayThis product is very helpful for clothes that fit but are slightly too big or too long. I broke it after the second use. Ill probably purshcase another one though.
-
Christine Perkins
> 3 dayThis works perfectly holding my clothing in place. I have a blouse where the sleeves roll up and they’re always falling down. This thing has made that blouse wearable again. It paid for itself would just that one item!
-
Mrs. Vida Abshire
13-06-2025Easy and it works!!!
-
Michael E Mangini
Greater than one weekLove this product! So easy to use and it really comes in handy when you need to just slightly alter your clothes as a temporary fix. I take this with me when I go have a girls weekend.
-
Cassie
> 3 dayThis does work but the needle you insert is thick so make sure you put it where you need it.
-
Crystal
> 3 dayI’m a busty gal and this little gadget has solved all my problems. I wish I would have had this years ago.
-
Lisa K. Brown
Greater than one weekWhat I received was not packaged as shown I received a device in a plain box with no instruction or any information on how to use. Not sure if it was a knock off or I paid full price for someone elses returned item.


Microstitch User Instructions
|
|
|
|
|
|---|---|---|---|
Removing the needle guard
|
Loading micro fasteners
|
How to remove a partially used clip
*Always discard clips that have micro fasteners that are out of place, distorted or damaged. A damaged clip can cause feeding or jamming problems. |
Inserting micro fastenersPush the needle of the tool through the items to be attached. Hold the material firmly against the front of the tool and squeeze the trigger completely. Release the trigger. Withdraw the needle and tool from the material. Material is now securely attached. |


|
|
|
|
|
|---|---|---|---|
Installing needles
|
Removing Needles
|
Helpful tips
|
|

