
Steadyrack Bike Rack - Wall Mounted Bike Storage Solution
-

Deion Hartmann
> 24 houreasy ti install and saves me space. I swing the rack to the side and I wish that there was a way to lock it in the position I needed it to stay in.
-
Kirsten Hite
> 24 hourLove these racks! Wish I had gotten them years ago. The skinny, hook-type racks work fine for our light road bikes, but our heavy mountain bikes with the wide tires wouldnt fit in them and were too big and awkward to lift up and try to make them fit. So we got these racks and love them. Our bikes wheels are 29 x 2.25 and they fit just fine in these racks with a little room to spare. Really love how easy it is to lift up the front of your bike and just roll the front wheel into the rack. Bike stays in place perfectly. We didnt even mount the rear wheel guide. And getting the bikes down from the racks are just as easy. Mounting instructions were good. We mounted on a block wall in our garage, so we only used two of the screw holes in the top and bottom of each rack and they are very sturdy. We mounted one a few inches higher than the other to give our bikes wide handlebars a bit of room to overlap. Highly recommend these racks for those that dont want to lift heavy bikes and deal with trying to get the bike tires to fit inside little hooks.
-
VMM1
> 24 hourOnce properly mounted on the wall, it is very easy to slide the bike in to it, regardless of weight. No lifting. Many other bike stands/ hangers require a person to lift the bike on to the hooks, which could be a problem. Very clever and sturdy design.
-
Izabella Gorczany
> 24 hourI was hesitant at first by the price because I needed 2. But after the easy install and ease of use, I couldn’t be more than happy to recommend this to everyone that wants a vertical rack that also saves space. Just do it, pull the trigger and buy this rack, you won’t regret it.
-
Jeff
> 24 hourThis rack excels in saving space without compromising accessibility. I’ve been using the Steadyrack ‘Fender’ and ‘Classic’ models for the last 6 months and they’ve worked great. I’m now done with the ‘ceiling hoist’ racks, and my teenage daughter can now put her own bike away. Pros: - saves space - Allows bikes to swing or pivot against the wall - Bikes can be mounted as close as 14” apart and still pivot against the wall - Relatively simple installation and online videos available - Simple to put bike up and down Cons: - not the cheapest solution - Drywall anchors included are inadequate (try and use a wall stud) I use the Steadyrack Fender racks to hold two 26” beach cruisers with large front fenders. The bikes are held vertically with the rear tire just off the ground. Just tip the bike up on its rear wheel and roll it onto the rack, and swing the bike to the side until the handlebar meets the wall (tires remain against wall while bike rotates to either side). Installation considerations: - Installation instructions state bikes can mount as close as 14”. This works for similar bikes (two beach cruisers or two mountain bikes), but with different bike types the handle bars can interfere with each other. You need to move them farther apart or stagger one higher off the ground. - Drywall anchors included are totally inadequate. Do not use these to mount into Sheetrock without a stud. I suggest using Snaptoggle type anchors (Home Depot, etc.). One reviewer marked this product down for the poor wall anchors. This isn’t unique to this product, included anchors are usually junk. Weight bearing items usually mount to a wall stud for support. I prefer not to pay extra for a product to include quality anchors, and if needed I purchase my own. If your priorities are space and convenience I strongly suggest you look at this rack. The ceiling racks I used were hard for my wife and I to use, and way too difficult for my kids. The bikes just weren’t getting used. I hope this review is helpful in selecting a bike storage solution.
-
Angel
> 24 hourThis is simple to install and the pivoting feature is why I got it. You will need to drill into the stud and screw in a lag bolt so if you don’t know what that means you might need help installing this
-
Bryan G
> 24 hourVery well made, came with very heavy duty bolts...not sure that is needed unless your bike is made of lead..having said that...rather have too study than too flimsy. Getting the height right is a tad tricky...rear tire must be off the ground...but... not that hard... I mounted to wooden post in my garage, and it works outstanding!! I do wish you could lock it into place...as it does tend to move a bit when loading..but that is minor. Overall, really happy with it, does what I want...although I dont smile when loading my bike like in their videos... :-)
-
Duncan
> 24 hourThese work very well, easy to install and look kinda cool. I have one for a thin tire bike (the tri-bike) and one for a fat tire (4 inch tire) bike. The only issue i have is that the fat tire bike rack touches the wall which keeps the fat tire bike handle bar sticking 30+ inches from the wall. I will probably take it down and mount it hire so I dont have to remember to avoid it (Im 5-6 tall). I would defiantly recommend these. If I get more bikes, I will be getting more of these.
-
daddy_will_fix_it
> 24 hourWe have 8 of these for our family. Some from Amazon, some from the local bike shop. Yes, it was a hard investment to swallow for the easier daily usage. All 8 racks cost about the same as the cheapest bike in the family. You would want a garage for a nice car, right? If you are using your bikes several times per week or more you will start to see the value of these. Just tip it back and roll it in. The lighter bikes get a small hop up of about 6, and that staggers the handlebar heights. We get all 8 bikes on the wall in about the same width as the sofa. 4 bikes are used daily, the other 4 are used 2-3 times per week, and all 8 are always easy to get to. I am the one that installed them all, and I agree that the plastic end caps are not always easy to pop on and off. I grumbled a bit when doing it, (it hurts your fingertips after the first 3 or 4...), but now that its done the pain is gone and they look nice enough. The mounting holes are huge. The bolts that were supplied looked about 3 times bigger than they needed to be. The instructions were very well written and easy to understand. Yes, Im normally the type that doesnt read the directions, at least with something as simple as locate wall stud, measure height, go. But the tip on just putting the thing on the floor and backing the bike up against a wall to measure along the floor was a very good idea. In my case of having 8 bikes I also measured the wall to handlebar distance, floor to handlebar distance, and handlebar width. With a page filled up with numbers for each bike I was able to pick the right dimensions to get everything installed once and once only, and still have the ability to put any bike in any rack without the bikes touching the floor or each other and taking up the least amount of wall space. With some 26, 29, and 700c size wheels those numbers can be very different. The wall studs were in random locations and not where I wanted the racks. I chose to mount some nice oak veneer 3/4 plywood securely to the wall studs, then freely position the racks on the plywood wherever I wanted them. The kids have also noticed that these racks are great for cleaning. On the maintenance stand the handlebars can swing around and whack em in the head sometimes. On these wall racks the front wheel is nice and stable, and the other bikes can be tipped away to the side while cleaning. About the only thing they use the park stand for now is the chain scrubber. Cant do that when vertical. Most importantly, these racks are a joy to use daily. It just encourages us all to get out and ride more because there is simply no hassle getting the bike out the door.
-
Keith Drury
> 24 hourThanks to the previous reviews I was careful with the plastic trim--both in prying it off to uncover the top and bottom holes, and in replacing it so my plastic housing is fine. The metal parts are overly robust--like they were made for 100 pound bicycles, so comparatively the plastic does seem lightweight--but it is only for dressing up this wonderfully sturdy bike rack. And, yes, it does really swing like a swinging door (you may have to loosen the vertical bolds a bit to get an easy swing). I installed two closer than they are supposed to be installed in my florida room--in a tight spot. I also installed one to hang up from the floor 2 (the way they recommend) and the other higher than they recommend (with the rear wheel touching the floor) so they would nest nicely in just 27 of wall space. One tire is 4 wide and the other 4 1/2 wide and both fit in the groove well. I am more than satisfied--very happy, with this product.


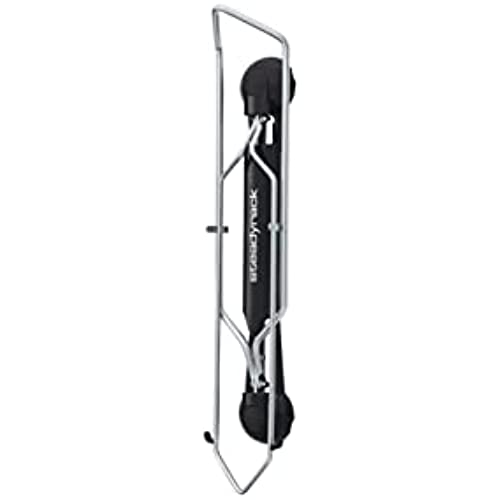
Steadyrack Fat Rack
Best for: Fat Bikes, eBikes with ‘Fat’ Tires
Wheel Diameter: 20" - 29"
Tire Width: 2.8" - 5"


The most versatile Fat Bike storage around
Easy to use, easy to load and unload, suitable for heaps of different bikes and helps you save valuable floor space in your home or garage.
-

Maximize Your Space
Steadyrack’s revolutionary design allows you to store your bike upright, off the floor and saves more of your valuable floor space. When the bike rack is empty, the arm simply folds away.
-

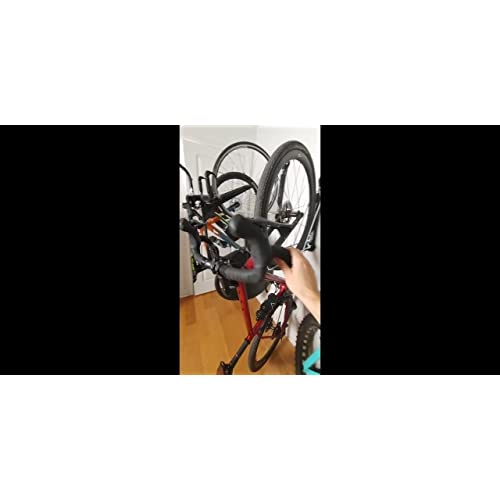
No lifting required
No need to lift and juggle your bikes, just balance your bike on the back wheel, push it in and allow the rack to do the lifting. An easy motion suitable for people of all ages and strengths.
-

Great value for money
Better bike storage means you can enjoy your space and your love for riding even easier. Millions of people all over the world trust Steadyrack because of how much easier it is to go riding.
-

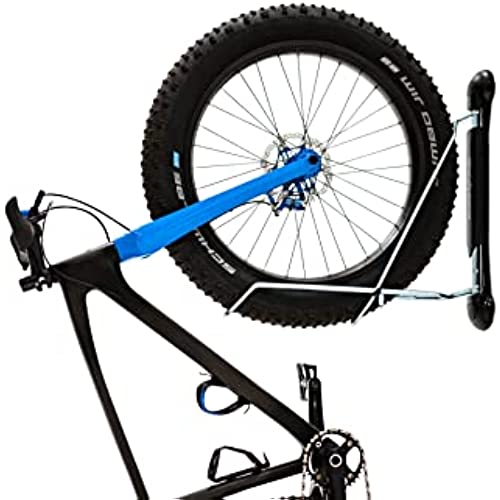
Tires fit snugly and securely
Holds up to 77lbs/35kg, bikes with tire width between 2.8" - 5" inches fit snugly and securely.
-

Swivels up to 160 degrees
Steadyracks can be mounted vertically to almost any wall and will conveniently swivel up to 160 degrees, from side to side, allowing for significant space-saving advantages.
-

Built to last to keep your bike protected
Steadyracks are made with high-quality steel and plastic components which are designed to last a very long time when properly maintained, and won"t damage your rims or the bike frame.
-

Make going cycling easy
Unloading a Steadyrack is a breeze. Just grab your handlebars and pull. You’ll be out riding before you know it.
-

Fit more bikes into smaller spaces
For limited wall space, you can stagger the height of the racks to overlap your bikes, making Steadyrack the perfect option for apartments and small sheds.
-

Easy to install
Each Steadyrack comes with fixings included for timber or masonry (brick/concrete) installation and detailed instructions. Easy for anyone with minimal DIY knowledge to install.
Choose the correct Steadyrack for your bike.
 Steadyrack Fat Rack |  Steadyrack Fender Rack |  Steadyrack MTB Rack |  Steadyrack Classic Rack |  Steadyrack eBike Rack | |
|
Maximum Weight
| 77lbs | 55lbs | 77lbs | 77lbs | 77lbs |
|
Recommended Wheel Diameter
| 20" - 29" | 20" - 29" | 20" - 29" | 20" - 29" | 20" - 29" |
|
Maximum Tire Width
| 2.8" - 5" | Up to 2.4" | 2.1" - 2.8" | Up to 2.1" | 2.1" - 2.8" |
|
Works with Fenders
| ✘ | ✔ | ✘ | ✘ | ✔ |
|
Bike Type
| eBikes with "Fat" Tires | Bikes WITH Fenders, Time Trial | MTB, eMTB, Gravel | Road, Hybrid, Small MTB, BMX | eBikes WITH Fenders, Commuter |
Choose the setup that’s best for your space.

Save Wall Space - Staggered
Limited wall space? You can stagger the racks to overlap your bikes, with Steadyracks placed as close as 350mm (1ft 2in) apart. For mountain bikes or other wider handlebar bikes, racks should be placed 406mm (1ft 4in) apart. Great for apartments and small sheds.

Maximize Floor Space - Level
Maximize your floor space by hanging your racks at the same height and further apart. A minimum of 600mm (2ft) gap between the Steadyracks will allow for the optimum pivot range. For mountain bikes or other wider handlebar bikes, racks should be placed 813mm (2ft 6in) apart. Great for garages.