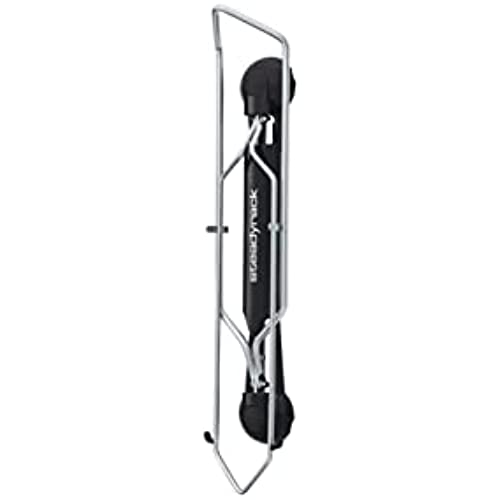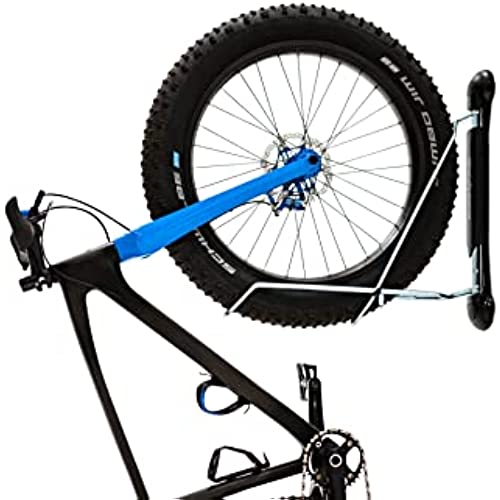


Steadyrack Bike Rack - Wall Mounted Bike Storage Solution
-

Jon Lipman
> 3 dayI love finally having a solution to keep my 2 bike neatly up against the wall... Im using a classic model for both a road and mountain bike I havent seen another solution that allows you to easily load and then fold the bikes in so its a great design! Im taking away a star because of the plastic body and rear wheel support - you would expect metal at this price although the construction of the rack itself seems very well made ...also, as other reviewers have mentioned, the rear wheel support doesnt really secure the tire. If you swing the bike on its hinge too quickly the rear wheel pops out. Still recommended but its hard to justify the price.
-

Matt Denesik
> 3 dayI installed these in our old garage and loved them so much, I took them when we moved! They even hang “hard to hang” Townie Electra cruiser type bikes. They’re sturdy, and we’ve had our bikes hanging within a couple feet of many exotic cars (for over 2 years now). To Install: I attached 1x4’s to the drywall in our garage. (I used a stud finder and secured them, with my own screws, to the studs beneath the drywall.) Then I used the included-bolts and secured those into the 1x4’s. This allowed me to hang the bikes where I wanted them… and didn’t restrict me to hanging them directly over the studs. Note: I’m a 31 year old woman with basic knowledge of tools/drills/levels/etc so anyone should be able to do this.
-

Jeff
Greater than one weekThis rack excels in saving space without compromising accessibility. I’ve been using the Steadyrack ‘Fender’ and ‘Classic’ models for the last 6 months and they’ve worked great. I’m now done with the ‘ceiling hoist’ racks, and my teenage daughter can now put her own bike away. Pros: - saves space - Allows bikes to swing or pivot against the wall - Bikes can be mounted as close as 14” apart and still pivot against the wall - Relatively simple installation and online videos available - Simple to put bike up and down Cons: - not the cheapest solution - Drywall anchors included are inadequate (try and use a wall stud) I use the Steadyrack Fender racks to hold two 26” beach cruisers with large front fenders. The bikes are held vertically with the rear tire just off the ground. Just tip the bike up on its rear wheel and roll it onto the rack, and swing the bike to the side until the handlebar meets the wall (tires remain against wall while bike rotates to either side). Installation considerations: - Installation instructions state bikes can mount as close as 14”. This works for similar bikes (two beach cruisers or two mountain bikes), but with different bike types the handle bars can interfere with each other. You need to move them farther apart or stagger one higher off the ground. - Drywall anchors included are totally inadequate. Do not use these to mount into Sheetrock without a stud. I suggest using Snaptoggle type anchors (Home Depot, etc.). One reviewer marked this product down for the poor wall anchors. This isn’t unique to this product, included anchors are usually junk. Weight bearing items usually mount to a wall stud for support. I prefer not to pay extra for a product to include quality anchors, and if needed I purchase my own. If your priorities are space and convenience I strongly suggest you look at this rack. The ceiling racks I used were hard for my wife and I to use, and way too difficult for my kids. The bikes just weren’t getting used. I hope this review is helpful in selecting a bike storage solution.
-

Jeanine Earley
> 3 dayThese were so easy to install. The only thing missing from the directions were how far apart to space multiple racks but a quick site search found the answer on their HELP section. The fact that you can swivel them to the side is awesome and an important requirement for me was that my kids can get them on and off without me. Hanging bikes from the ceiling was not going to work for that. Now in the video the little kid made it looks effortless. I will day for my daughter who is shorter it was a little bit more challenging than how they have it shown, but a little practice should fix that up easily.
-

rose_macaron
> 3 dayMeasuring the height is somewhat tedious, but ice you have the position, the rest of the installation isn’t too bad. I love how much space these save. Because they swing easily they are easy to put up and down if you mount it at the ideal height for the bike you plan on storing there. Without this I couldn’t reasonably store my bike in my apartment. Definitely be sure to follow the instructions and only install in studs. I had no issues with installation and it’s very sturdy, but a heavy bike held up by drywall would be a bad day.
-

Bertrand White
> 3 dayI purchased two of these racks to hang my Specialized road bikes vertically on the interior wall of my spare bedroom. Installation was straight forward and once youve located the studs in the wall (highly recommend mounting to studs and not using the expansion anchors) the installation is very easy. The only criticism I would have is that the installation instructions are pretty lacking for people who dont have a lot of experience in handy work. If you dont have experience with similar installations, Id recommend getting a friend to help or hiring a professional. Aside from locating studs, youll want to be sure to avoid plumbing and electrical utilities in the wall. Once installed, the racks worked great! Unlike many other wall mounting methods, Im not worried about improperly installing the bike and potentially messing up the spokes or having the bike come crashing down. Mounting the bike on the racks is super easy, and my petite 5-0 girlfriend has no issues getting her bike into the rack. The rack is incredibly solid and I have no concerns of their quality. I would definitely recommend these racks to a friend. In fact, I have a friend that Ill be installing these racks for in her garage.
-

Monique M
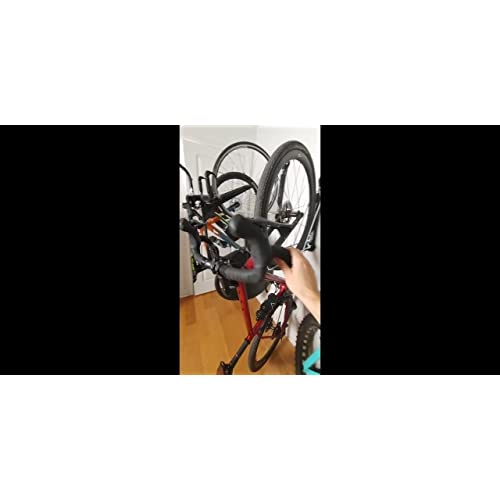
> 3 dayBought these after doing lots of research. When I finally decided I wanted the bicycles off the floor with easy access, I decided on this brand primarily for ease of use and ability to swing the bicycles 90 degrees either side to minimize the protrusion into the garage space, which is being used for a car detailing business, a workshop, and an exercise area. I decided not to mount the racks directly on the 16OC studs because I wanted the bikes spaced about 12OC apart to maximize wall space. I spent more time planning and measuring than my husband and I spent installing the back boards and racks. I created templates and taped them to the wall to arrange how the back boards and racks would be mounted (see picture.) Then I cut and attached the back boards (2×4s) for each bike, which were all approximately the same size. I staggered the height of the racks so that the handle bars would clear each other and allow the bike to be mounted closer. I am very pleased with this purchase, and would purchase more if needed. I highly recommend! Oh and our 23 yo son said they were cool.
-

daddy_will_fix_it
Greater than one weekWe have 8 of these for our family. Some from Amazon, some from the local bike shop. Yes, it was a hard investment to swallow for the easier daily usage. All 8 racks cost about the same as the cheapest bike in the family. You would want a garage for a nice car, right? If you are using your bikes several times per week or more you will start to see the value of these. Just tip it back and roll it in. The lighter bikes get a small hop up of about 6, and that staggers the handlebar heights. We get all 8 bikes on the wall in about the same width as the sofa. 4 bikes are used daily, the other 4 are used 2-3 times per week, and all 8 are always easy to get to. I am the one that installed them all, and I agree that the plastic end caps are not always easy to pop on and off. I grumbled a bit when doing it, (it hurts your fingertips after the first 3 or 4...), but now that its done the pain is gone and they look nice enough. The mounting holes are huge. The bolts that were supplied looked about 3 times bigger than they needed to be. The instructions were very well written and easy to understand. Yes, Im normally the type that doesnt read the directions, at least with something as simple as locate wall stud, measure height, go. But the tip on just putting the thing on the floor and backing the bike up against a wall to measure along the floor was a very good idea. In my case of having 8 bikes I also measured the wall to handlebar distance, floor to handlebar distance, and handlebar width. With a page filled up with numbers for each bike I was able to pick the right dimensions to get everything installed once and once only, and still have the ability to put any bike in any rack without the bikes touching the floor or each other and taking up the least amount of wall space. With some 26, 29, and 700c size wheels those numbers can be very different. The wall studs were in random locations and not where I wanted the racks. I chose to mount some nice oak veneer 3/4 plywood securely to the wall studs, then freely position the racks on the plywood wherever I wanted them. The kids have also noticed that these racks are great for cleaning. On the maintenance stand the handlebars can swing around and whack em in the head sometimes. On these wall racks the front wheel is nice and stable, and the other bikes can be tipped away to the side while cleaning. About the only thing they use the park stand for now is the chain scrubber. Cant do that when vertical. Most importantly, these racks are a joy to use daily. It just encourages us all to get out and ride more because there is simply no hassle getting the bike out the door.
-

RaterGator
> 3 dayInstallation was a breeze with the right tools and know-how (used stud finder), and the fact they can swivel and fold up is awesome. The only downside is with the ordering process. Notice that the unit price of the multi-pack bundles is higher than individual units. Fortunately, Amazon gave me a credit.
-

Cheryl
> 3 dayLoved the idea but didn’t work for our situation. Not enough room in our space. Will consider again if bigger garage


